Building a Successful Brooder
P.S. All this is summarized like a recipe of sorts at the bottom
THE BOX
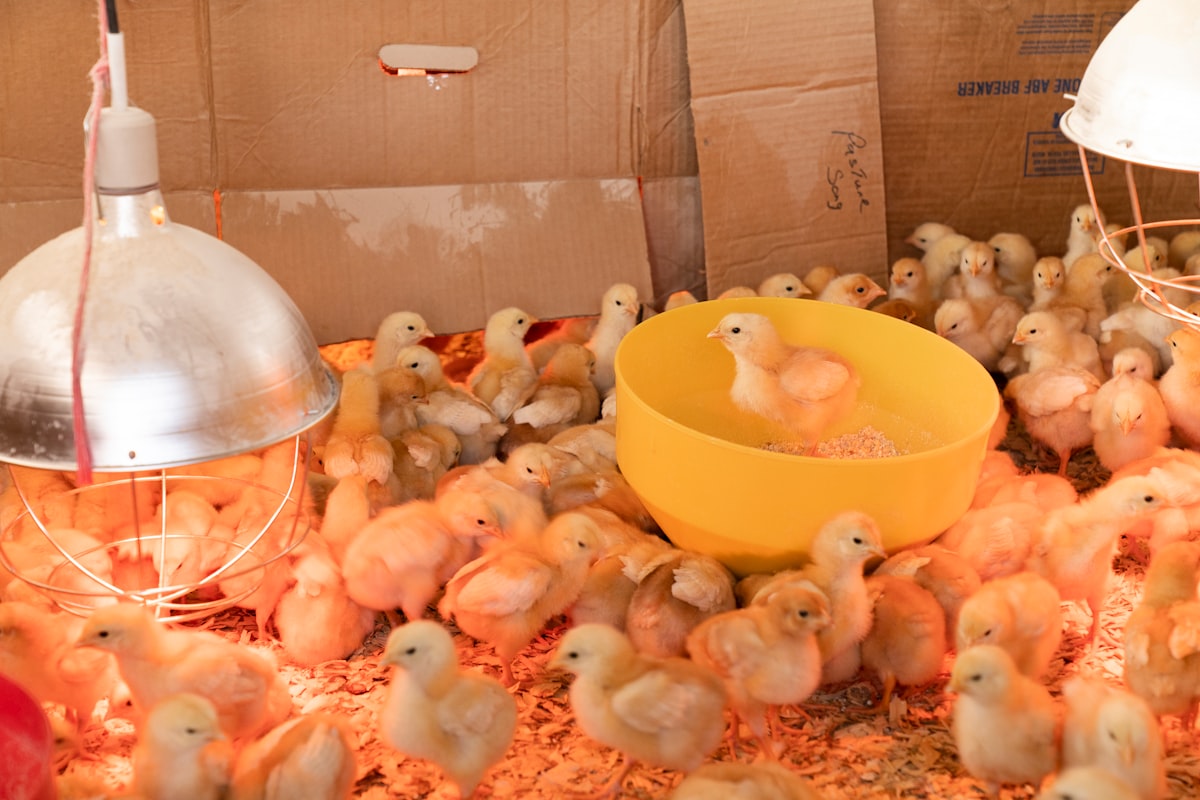
First, let's talk about containment. What are we going to raise these babies in for the first few weeks!? You're getting these cute, fluffy things we already know you want them to be in the chick taj-mahal, but wait. There is such a thing as too much space. the goal is to have 2-4 chicks per square foot for the first 4 weeks of life. Now you're probably thinking... that's not much space! Exactly. The more space you give them, the more area you need to regulate the temperature. Once they're 3-4 weeks old, they'll need 1-2SQFT per bird.
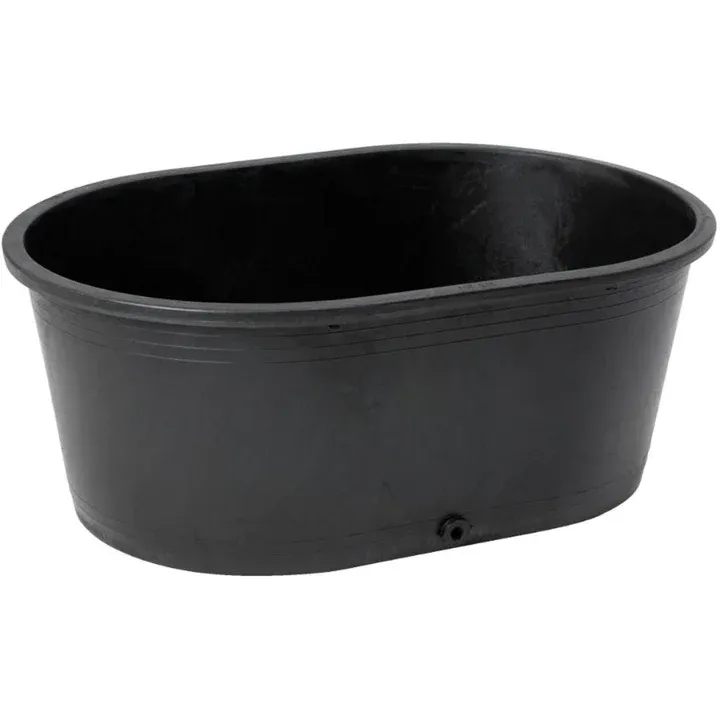
For material? Ideally, something you can sanitize like plastic metal or structured rubber. Everyone loves a good DIY project, so I'm sure you have considered building something from wood. You can move on with your DIY project, we simply suggest you line the floor and bottom a few inches with a durable plastic. Wood alone is porous and likes to hold onto germs and bacteria. What you will use or build will depend on how many birds you're raising. For reference, what works perfectly for a small flock (<20) is a 100(ish) gallon stock tank. Typically they're about 11 SQFT, so for the first 1-2 weeks you have a divider up, so they can only access half. Move that divider as they grow to give them more space. This way, you do not have to move them from the 'small brooder' to the 'big brooder'. You'll also want to make sure the walls are at least 12 inches high to prevent them from escaping. You may also find the need for a wire lid depending on your breed and setup.
THE TEMPERATURE
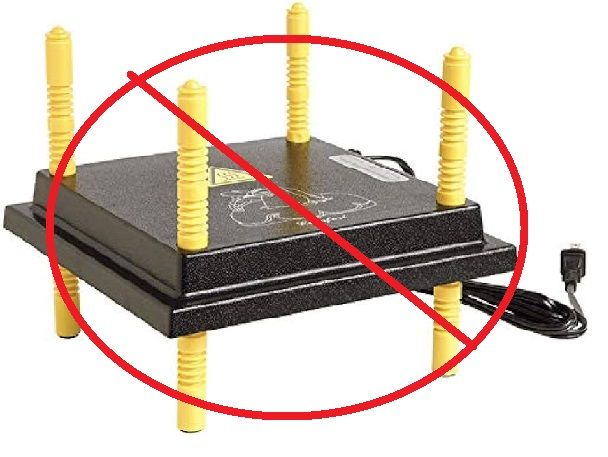
For the first 10 days, you need to keep your chicks at a consistent 95°-100°F. This is by far, the most important part of your brooder. USE A THERMOMETER to read the temperature, don't guess! Use heat lamps or ceramic heaters. Avoid using brooder plates. NEVER use heating pads or space heaters.
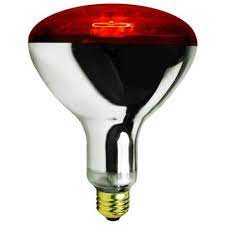
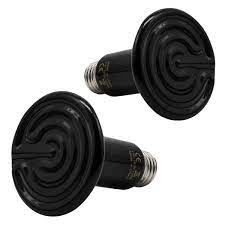
We recommend a red or ceramic heat bulb and a sturdy heat lamp. This is by far the most accessible, versatile, and economical option. They emit a lot of heat over a wide area, making the heat more dispersed throughout the brooder. Make sure your heat lamp is securely fashioned to mitigate fire risk. A 125 to 250-watt red heat bulb is popular, but even better is a ceramic bulb. They emit no light, therefore allow your birds to develop a circadian rhythm. They're also less likely to break or shatter and are in a similar price point, accessibility, and wattage options as the red heat bulbs. A red heat bulb is still a very popular and reliable choice, the ceramic just offers some slight advantages.
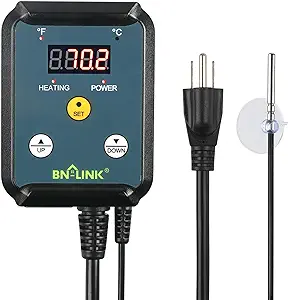
If you want to go the extra mile and make your brooder even a bit more automated, you can get a thermostat-controlled plug. This has a probe that is a thermometer, and the outlet has a customizable temperature range that will turn on and off your heat lamp based on your settings. This takes some trial and error in the beginning, but it's a really great investment tool to keep your chicks comfortable.
Please, please, please consider using something other than brooder plates. They're becoming increasingly because they don't emit light, and they're an extremely low fire hazard. All those are great characteristics, but that does us no good if it can't keep your chicks warm enough! If you use this plate, your chicks are only receiving warmth UNDER the plate. Know what can't fit under this plate? Food. Water. All your chicks at once (probably). Not only is it not 100°F under this plate, you're basically forcing your chicks to either be warm or be fed. The only way this brooder plate works is if the ambient air temperature in the rest of your brooder is 85+°F and you have a small flock that can fit under here all at once.
You should always be using a thermometer to regulate your brooder temperature. Always. With that, you can consider your chick's behavior. If they're huddled under the heat source, they are cold. If they are at the furthest point from the heat, they're too hot. You also want to be sure there is not a huge temperature swing from one side of the brooder to the other. You want no more than a 5-10° temperature swing from your warmest to coolest spot. Again, you cannot gauge that kind of precision without a thermometer.
THE BEDDING
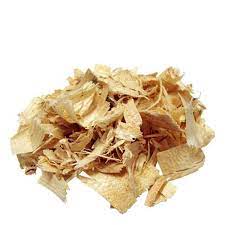
Easy. Large flake pine shaving. Why? Cheap. Accessible. Non-toxic. Too large to eat. Absorbent. Any non-chemically treated hardwood shavings would work. What we don't recommend you use is newspaper, straw, or cedar shavings. Newspaper is too smooth and impairs proper foot development. Straw has that smooth, slick outer coating that makes it hard for their feet to grip on and doesn't absorb any moisture from the droppings. Cedar is treated and can be toxic if consumed.
THE FOOD
This one is a great debate and will vary widely on poultry type, preferences, husbandry practices, and your goals with the chicks. Non-GMO, organic, medicated, unmedicated.. what is important, what's is a preference; We'll give you our opinion.
Baby chicks need to be on some variety of chick starter crumble. For example, a 'standard' chick starter is 20% protein, 1% calcium, and higher lysine, and phosphorous, whereas a layer feed is 16% protein with 5% calcium and lower levels of lysine and phosphorous. Giving chicks a feed formulated for adults will inhibit their growth, and could cause lifelong damage.
Medicated vs unmedicated. This is going to depend on your vaccination status. It's widely understood that 'if they're vaccinated, feed them unmedicated feed'. It's not that simple. What are they vaccinated for? This is only true if they are vaccinated for Coccidiosis. If they are unvaccinated, or vaccinated for anything other than Cocci, you have the choice between medicated and unmedicated feed. Generally, we recommend medicated feed because it's such a small upcharge for such a common ailment (Cocci) with little to no side effects.
Non-GMO, organic, 'natural' feeds, etc are all exclusively personal preferences. If they align with your lifestyle and husbandry practices, they're a fine choice.
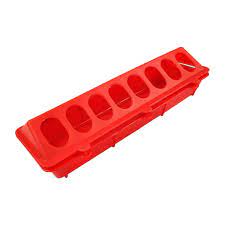
For your feeding practices, we recommend the following. Sprinkle feed on a paper towel for the first 2 days. The contrast between the feed crumbles and the paper towel makes the food more visible and triggers their natural curious, pecking response, thus encouraging them to eat. Style of feeder is again, personal preference; the main requirement is that at least 1/3 of your flock could eat out of it simultaneously. Popular styles are gravity-fed, and flipflip-toptop feeders are very popular and accessible. Chicks should have 24-hour access to feed.
THE WATER
Good 'ol H2O. All baby poultry need access to clean, fresh, room-temperature water. Don't give them cold water as chicks.
If you received your chicks through the mail, it's especially important that they are hydrated ASAP. Here at Mt. Healthy, we offer a Vitamin Stress Pack, it's water-soluble vitamins, and electrolytes to help aid in quick re-hydration.
For water, there are a few more 'standard' options for the delivery of water to your chicks than there are for feed. You have gravity-fed options, nipples, drinking cups, and bowels. The same rule applies, 1/3 of your flock should be able to drink simultaneously (the only exception being nipples - we'll get to that)
Gravity fed
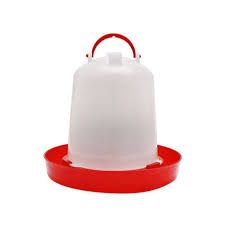
The most common option, they are very cheap and accessible. Depending on the depth of the bottom plate, you may need to fill the bottom with rocks/marbles to prevent chicks from getting wet. The base is more likely to get dirty than other options. If you use this option, we recommend elevating to the chick's chest height to prevent litter and debris from getting in the water.
Drinking Cups
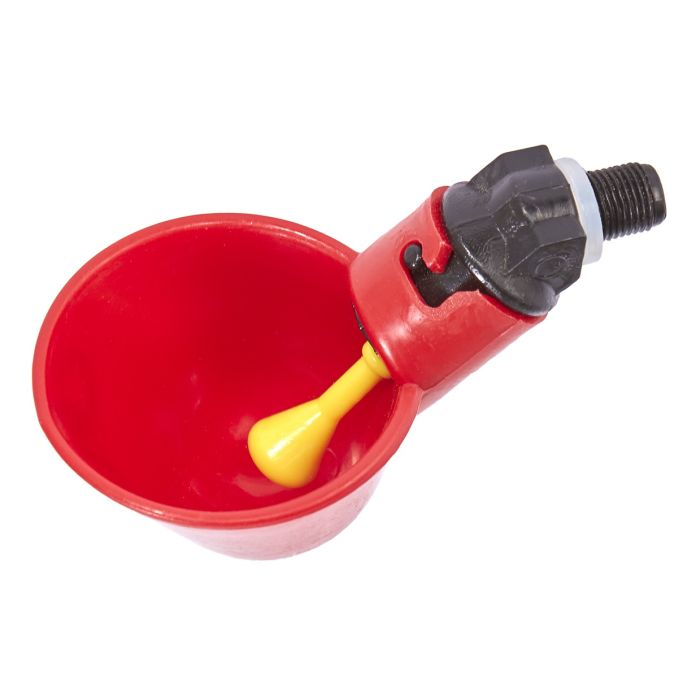
A cleaner option than the gravity-fedy fed drinker, while maintaining that natural inclination to drink from a pool of water. You can mount these into a bucket, pipe, bottle, etc, which makes them more versatile, but also a bit of a DIY. You can make a high-compacity drinking system fairly cheap with these. They also have a tendency to leak if not installed perfectly. Pre-made systems don't normally leak but are expensive in comparison to other drinkers of similar volume.
Nipples

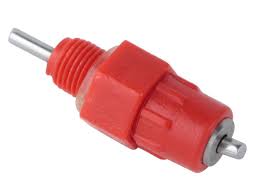
These are the most sanitary, but also the most difficult. They require a bit of 'training' or vaccination from your flock. Vertical nipples are easier for the birds to use, but limit your basin to be hanging, versus if you use horizontal nipples your basin can be sitting on something. They, like the cups, are very economical and customizable if you're interested in a DIY, but pre-fabricated systems are pricy. Again, if not installed perfectly they will leak. But, without a doubt, the most sanitary option.
Bowls/Basins
This is not a suitable option. The issues with this are getting the chicks wet, cold, drowning, litter and feces dirtying the water, this offers a whole slew of risks and issues. We do not recommend these even for waterfowl. We do not recommend this for waterfowl for the same listed reasons plus they should not be swimming until they have shed all their down.
THE EXTRAS
Supplements
We recommend a vitamin/electrolyte supplement for the first few weeks. Baby chicks don't need much, if any grit for a few weeks. If you do opt to give them grit, be sure it is size-appropriate, and given to them as free choice. Do not mix grit in their food. Do not offer baby chicks oyster shells.
Treats
Popular treats are mealworms, grubs, cracked corn, scratch and sunflower seeds, and table scraps. Most of these you can get at your local farm store. Treats are just that - treats. If you offer them treats too often, or too much of them, they will not eat the food that is perfectly balanced for their optimum growth and health.
'Toys'/Enrichment
These are known as 'boredom busters'. Although not required, they certainly can help with the dreaded pecking order. Birds will always have a pecking order, that's just a way of life for them. But if they have something else to peck at beside each other, it helps keep everyone, including you, a little happier.
Popular additions are mini roosting bars for them to practice roosting, a feather duster to simulate a momma hen, and a mirror, we've even seen folks mount a children's xylophone and hand spoons in there, chicks love to peck at shiny materials.
And there you have it, aspiring chicken whisperers! Starting chickens from babies can seem intimidating, but with the proper set-up, it could be the easiest job you've had. Preparation is key! Your journey into the world of chick-raising is set to be nothing short of eggstraordinary. From crafting the perfect brooder to selecting the ideal bedding, and temperature regulation – we've covered it all in Mt Healthy's Chicken Chat.
The 'Recipe'
to build a great brooder
THE BOX
- Maintain 2-4 chicks per square foot for the first 4 weeks, then 1-2 per square foot for the following 4 weeks. (Use your discretion for smaller fowl like bantams or pheasants or larger ones like waterfowl or turkeys.)
- Choose materials like plastic, metal, or structured rubber for their sanitization advantage.
- For smaller flocks, a 100-gallon stock tank, partitioned for gradual space expansion, is effective.
THE TEMPERATURE
- Maintain a consistent 95°-100°F for chicks during the initial 10 days, dropping 5°F weekly.
- USE A THERMOMETER to gauge your temperature.
- Use a red or ceramic heat bulb with a securely fastened sturdy lamp. Don't use a brooder plate.
- Enhance automation with a thermostat-controlled plug for precise temperature regulation.
THE BEDDING
- Prioritize large flake pine shavings for their affordability, accessibility, and safety.
- Don't use newspaper, straw, or cedar shavings due to numerous drawbacks.
THE FOOD
- Provide chick starter crumble with appropriate protein and nutrient levels.
- Choose medicated feed based on vaccination status, if unvaccinated or vaccinated for something other than Cocci, lean towards medicated feed.
- Non-GMO, organic, or 'natural' feeds are based on personal preferences.
- Initiate feeding with a sprinkle on paper towels for the first 2 days to encourage natural pecking responses.
THE WATER
- Ensure access to clean, room-temperature water; avoid cold water for the chicks.
- Select from gravity-fed options, nipples, drinking cups, adhering to the 1/3 simultaneous drinking rule. Avoid bowls, even for waterfowl.
- Utilize a Vitamin Stress Pack for quick rehydration, especially for chicks received through mail.
THE EXTRAS
- Introduce vitamin/electrolyte supplements for the initial weeks, optimizing hydration and overall health.
- Incorporate treats like mealworms and cracked corn judiciously to maintain a balanced diet.
- Use appropriately sized grit, do not offer oyster shells.
- Explore 'boredom busters' such as mini roosting bars and mirrors for enhanced environmental enrichment.